Monday, 26 April 2010

this weeks objectives...

Matt

finish up animation of shot 4 (mid to end Tuesday)
Your next few shots...
Shot 24
Shot 22

Adam

Tuesday - collect lit and textured environment with Matt's imported animation and test the render layers with this.
Post render results - breakdown of each layer and then final composite of all no later than Thursday

Tom the Stocker Wright

Shot 26 - Heros Reaction shot. See email with link to shot list and Animatic for reference.

Tom R

Tuesday - review of shot 23. Please send playblast Tues eve/Weds morn for update.

Emma

Shot 11 animation.

Clym

Animate shot 31

Sarah

Finish up the button issue
Finish up L Gnome Facial Control Panel
Scale Characters
Copies on the adrives
Notifications and info to the animators
Animation: Shot 18


Edit: whoops, should have been on the team blog

Sunday, 25 April 2010

Frankenstein's Bride: Shot 36

Ok so little franken lady has sort of been abandoned...ok she's in one shot but time to trash all those months of hard earned modelling and blendshapes to make her look...generally quite naff in the name of the film.

taking inspiration from...the animatic...she still looks pretty all together to be honest but were gonna go nuts on the smash, cracks, sellotape in texturing on this one. I cant change too much of the model without it needing UV mapping once more. If time were permitting i'd do a complete destruction job of but for now it will have to remain as this.
and other franken creations!
ah graph editor...why cant all your curves be as simple as this :P
More problems with Hero Gnome: i cant scale the character via the master control. His facial control panel seems to be limiting the amount of expression i can actually use with the character. Have emailed Clym for his thoughts on how to rectify these issues. Told him i am in Monday at college to sort this out so hopefully Clym can help me out with this one.


nightmare on elmo street.

grrr....annoyances

-been sorting out individual web page images and descriptions for the degree show website as well as the groups web page images. These aren't finalized but its better than having nothing for now just so people can see what were up to.

- roman sent through a new soundtrack which was AWESOME...it was only the starting piece but i really think hes taken my feedback in and is getting to grips with what the projects about.

- Yanivs UV mapped Hero Gnome was wrong - face separate from body which meant i couldn't add a texture to one without it affecting the other. Ive begun painting the textures in order to get a better idea of colours. Although i have the character colour concepts at hand, its amazing how in 3D they look almost too washed out by following the concept colours exactly. There's something about volumes etc which means you have to tweak the saturations a little bit. These characters have a range of splashes etc on them too so its all about balancing them to look painted without being an art attack accident.

Sorted out Clyms facial control panel was scaled and parented to the master control so it would follow the model for the animator to animate with eeeeease.

Lady Gnomes facial control panel was hooked up to the blend shapes and parented to the master control so the animator can animate with ease.

Both these characters were then scaled appropriately so each animator is all working to the same scale so there's no probs when importing the characters into the scene for final rendering with the environment.

started animating with characters...hero Gnome does not work on my machine in smooth preview i cant play back stuff and not in smooth preview means i cant do any facial expression animation.

Saturday, 24 April 2010

Heros Zero Pose for Root Cntrl

i apologize...heros root control missed out on being completely freeze transformations along the way.

his "normal" stance is:

translate X: 0
translate Y: -0.082
translate Z: 0

Its my fault...i made a mistake on that one.

Wednesday, 21 April 2010

a shhhhhhhrrruuuubary!


a few images testing the textures. Thoughts on the textures pleeeeeeease.


Monday, 19 April 2010

paint by numbers

Werhey! Cant tell you how brilliant it is to finally see these models with colour on them..long overdue and i think its whats spurring us on these days...lambert 1 drains...the...soul. Tom i took your models...and...er....slightly tweaked them. Not your fault, the drawings gave you to work from meant the 3D models looked slightly unison and perfectly rounded so i smashed and dented em up a bit.

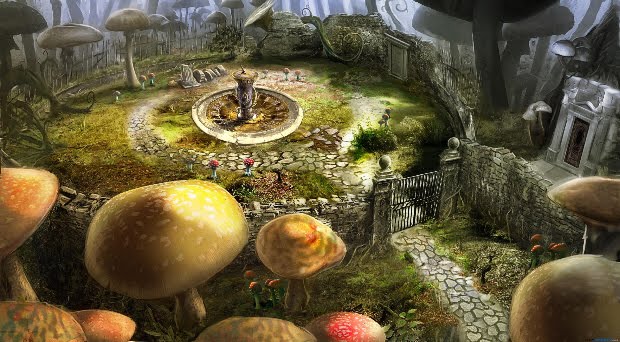
inspiration for which came from here....


...shame about the story line....

moving on

Anyway I've been texturing the mushrooms this evening, the underneath has been tad annoying to get round due to how the UVs were sewn. Nevertheless its just something that requires juuuuuuust a bit extra time on in order to make it look right.

Starting out...i paint out/mark out the basic colours so i can see where each start/finish.

adding the layers in photoshop
main mushroom complete...just have to the how to to the others

so far so good :)
more to come soon

Sunday, 18 April 2010

Sunday 17th April

Its awards time and the following have been awarded worst email usage at the weekends...


Been carrying on with my section of texturing today...

Painting the pots. Wanted to try and capture a dusty terracotta look here which i think is starting to work but needs a few more tweaks etc. The pots are ok but again havent spent more than 15 mins on colouring these...seriously quick with throwing the old paint about...its all about being messy and loose with the design...no definitive structure.
Painting the stomas? (im not a flower expert) for Hero's Orchid...i began by roughly painting and then applying the texture to see how it stretched and then removing colour with the poly lasso tool to neaten it up. We wont see super close to the flower but just so the geometry makes sense.
Lambert 1 making a disappearing act there off the top petal...nice.
Flower deux...Once i mastered one petal it was simple enough to transfer over all the layers to the other petals. These arent symmetrical tho as ive tweaked opacity, sizes and duplicated/removed layers to make each of the petals unique. Flowers are random so i figured why not...

Flower numero deux has taken a bit of a leading role...unintentional i can assure you, but i think we might have to change numero deux to be Heros flower. Whilst i was aiming for a tropical feel with the real Heros flower, i think the purple colourings really contrast with the rest of the garden making it stand alone as something individual. Im so happy with the texturing on this too i think it deserves to be centre stage...will discuss with the guys tomorrow on this one to get their ideas. The stems are looking ok, possibly more work in variation of splats etc is needed but you have to be careful not to start making it look like army camoflague!

Saturday, 17 April 2010

a painted world

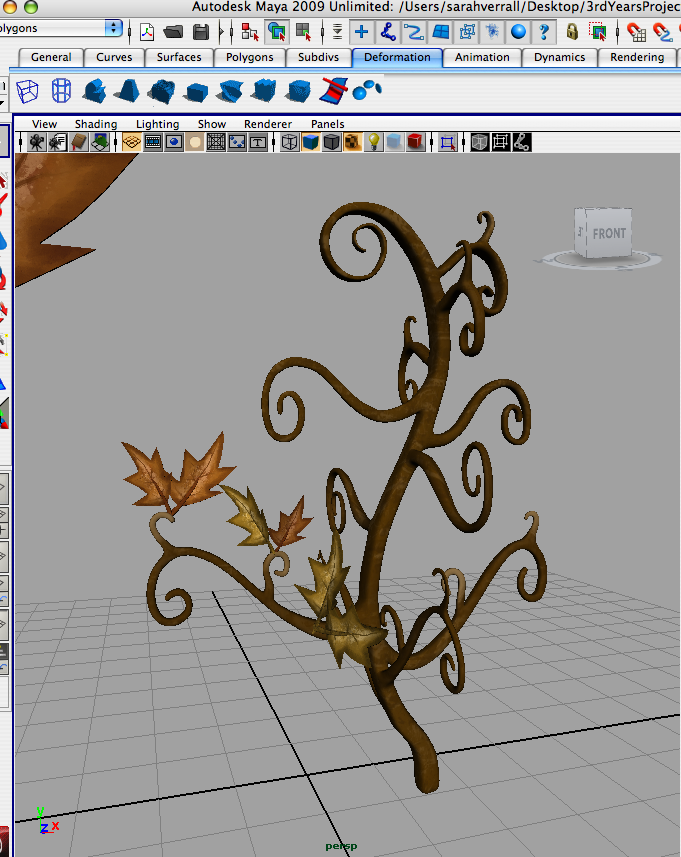
Im having a lil go at the old texturing. I've done this a couple of times in the past but this is a bit of a refresher for me. Im texturing Heros flower, flower 2 and the weed as well as their pots using the photoshop brushes to create a painted feel

I wanted Heros flower to have an almost tropical element to it which i think the orchid model creates. Here Ive referenced a photo from Kew Gardens for the colourings but adapted it for the painted quality were after. Thanks Mr Smith for your photo as reference :)


The Weed: My first textures for the weed stem...its a little pale...and looks....ill! Needs a few more layers and splashes to break it up.
First applications of the Heros flower texture...when the layers are combined its lost a lot of its contrast in colours, need to bring stronger contrasts such as reds and whites. Not bad for a first test though.

Inspiration came from realistic flowers that from my memory mean their colours/design have spliced together as if using one of those spirographs.

idiotic mistake numero 1: where the hell are the textures?
"...ah for the love of-"
Building up the layers of colour, trying to bring in some contrasts to the design by introducing some yellow slices of colour to break up the purple.
the painted designs are a matter of impulsive creation meets not trying to overpower the viewer with lots of splats. I started with a basic set up and i literally tweak, shift, alter opacity and update the textures in Maya. Once one petal/leaf is correct, its a matter of copying over the layers and adjusting accordingly to bring variety to the model. Im really happy with how this is looking so far and its great to see the models in something other than lambert 1 :)
The weeeeeed: looking like camouflage but a better colour here


That evenings work.....p......p.......d...........


Friday, 16 April 2010

Gnomes Webpage: Images so far...

Hey Dan,

heres what i would like you to upload to the InsideOut Gnomes page please. This is just images i have sorted out but i'll ask the others to get some stuff together too and send it on to you.

thanks

Sarah


The Description:

The rivalry between two garden gnomes is interrupted by a new arrival. In a conflict of brains vs brawn, the two battle it out to win the affections of the beautiful Lady Gnome, but who will win, as this is no ordinary love story.

Updated Film Image:


Images:


Individual Webpage Stuff


Modelling and Animation Showreel 2009


Portfolio

Gnomes (2010)
: I designed the characters, set and props for the film, as well as modelled Lady Gnome and the key scene assets. My roles also included story development, texture creation, character setup and animation.

Rendered occlusion of Lady Gnome


Character concepts for Hero Gnome.


Post Apocalyptic London (2008)
Occlusion render of environment models for environments project. Roles included environments and assets modeller, as well as character animation.


John and Benny (2009)
Roles included; story development, character design and modelling, UV map and texture application as well as character setup.

Composited render of John the Clown.


I love photography. As well as freelancing for a sports and events company, I also experiment with digital and analogue mediums in my free time. I enjoy creating spontaneous and interesting outcomes from mixtures of colour and light.


Edinburgh (2008)


Barcelona (2008)

fridays jobs

emailed roman intial sound score feedback

emailed greg sound score feedback

uploaded UVd props to the adrive account

discussions with Yaniv about blendshapes - problems with internet and power at his end though so waiting to send these off to Clym with the rig for skinning and GUI facial control panel creation.

Wednesday, 14 April 2010

to my wigging friends...

this is a little message to EVERYONE who has helped me out this week with the rigging errors or issues I have had and have given up their time to assist me...Clym, Alex, Tom, Stu....all of you have helped me so much so big big thanks to you :)

Tuesday, 13 April 2010

a lesson in bomb proofing...

heres a tip...

make a rig...build the controls....make the spline....make the...the set driven keys...THEN pass it over to a complete stranger...someone whose never used maya...or animated...someone whose sitting on the bus next to you and tell them

"heres a rig...could you just...you know...have a play around with it"

because i can assure you, they will highlight the problems with the rig in an instant. Its a painful process of aahhh nnoooo dont rotate that...ahhh jeeeeeze i need to lock that off and ahhh crap thats not quite clear enough. Watch in horror as the whole thing is pushed and pulled in the most unglamorous fashion ever imaginable and then think to yourself maybe you need to spend another 20 minutes making it clearer.

For certain though, its all about making your rigging better and your rigs bomb proof...water tight...etc.

Friday, 9 April 2010

the best things in life may not be free


it's said: a bad workman blames his tools

true...but that workman didnt have the worst somewhat version of Maya ever.
Ive been using 8.5 since year 1 of CVA and its had no end of errors. "Sarah...thats Maya for you so get over" i hear you say. Ok maybe..but exploding UVs and files that corrupt themselves when you havent opened them...na ah.

Good bye 8.5...you served me...somewhat well but Im replacing you with a much better version....no its not 2010...frankly my mac is so ancient the operating system tiger cant comprehend a version of maya so advance...so its 2009 for me! horay! no more problems....

EDIT: this may have been the most naive thing i ever said

Friday 9th April

research into presentation materials for degree show, downloaded a few templates for postcards we can upload some of our concept art to and have professionally printed, might be nice give away for the delegates: colour script and environement concept

stephen pender: email back saying he will continue to work on his animation regarding the feedback i provided the other day.

emailed Matt (1:30am) feedback regarding shot 32

emailed roman (sound composer) to see how hes doing with the test score for the film. He will mail monday with the first 42 seconds of animation score.

blendshapes....must...complete.

Tuesday, 6 April 2010

Rig: Double Transformations

gah! egad and zooks!
So i went to import the completed rig so i could modify to fit the Lady Gnome model and guess what? Annoyingly so the spine seems to be going ahead of the legs: double transformations. I thought this only occured after creating the master control but there you go. I followed step by step instructions about turning off inherit transformations with no success.

addition of a master control:

Double transformations still occurring. This occurs because the IK Spline receives influence from both cluster deformers and the IK Spline.
Select the spine curve and turn off inherits transform. This should remove one of its influences so the rig follows as one...however mine seems to have collapsed?!

I unchecked the inherits transform from both the spine shoulder control and the hip control to see what difference this made. The rig did then follow all together but it led to the controls and clusters being left behind..but still able to control the rig as you can see below.


Email the Hulse...


Alex took a look at the scene and the rigs setup to which there were no issues, and after a few removals of inherit transform, he decided the best way was to remove the spine curve from the group as this was the factor causing double influence. Once this had been removed, it was simple enough to turn off the inherit transform check box on the IK Spline and then add all controls to the master control..Perfecto, all done dusted and in working order. Now to finally adjust the rig accordingly for Lady Gnome and were off...to the next stage

Removing the Spine curve from its group removed the influence over the rig

so that once the master control was created and all controls parented too, hey presto, no more double transformations. So annoying how these things are down to order of parenting/adding etc but hey ho.

Monday, 5 April 2010

Rigging: Lady & Hero

Asking discussions with Yaniv, his workload on Red Rock has increased so it didnt seem fair to expect him to rig his character considering he has a whole character to model for his other film. Whilst i could copy over the rig used in Macho Gnome, there were a few niggling errors and missing attributes and general things i wished to improve upon, so i decided to start from scratch for these two and would alter one accordingly to fit the other model.

The rig is on a seperate layer to the controls and the rig is switched to unselectable so theres no chance of an animator moving about the joints.
all locaters are serperated on their own layer which has been labelled unselectable. All controls have necessary translates and scale attributes locked off so they cant accidentally be moved about. I've changed the knee pole vector constraints to curves as it means we wont have to hide them when rendering out...annoyingly i cant believe i forgot this when following the rigging tutorial for Macho Gnome. Overall this is not too dissimilar from the last rig, but is just that bit better, slicker...well...to me it is.


Reverse foot. Though our characters should 'plod' when animating its necessary to have this level of control over the model otherwise the animation would look primitive.
A quick outline of the rig...a couple more bones necessary to distribute the weight for the face/back and sides as noted by Matt for my last rig of Macho Gnome.
creating the IK Spline...hopefully this wont need to be removed (Daves showed me where you can remove influence from the cluster deformers) so hopefully we wont have to improvise with the weights this time.
Test out the leg bending with the added root control.
This rig has the added toe flick attribute, thanks Dave for showing me how to create this.
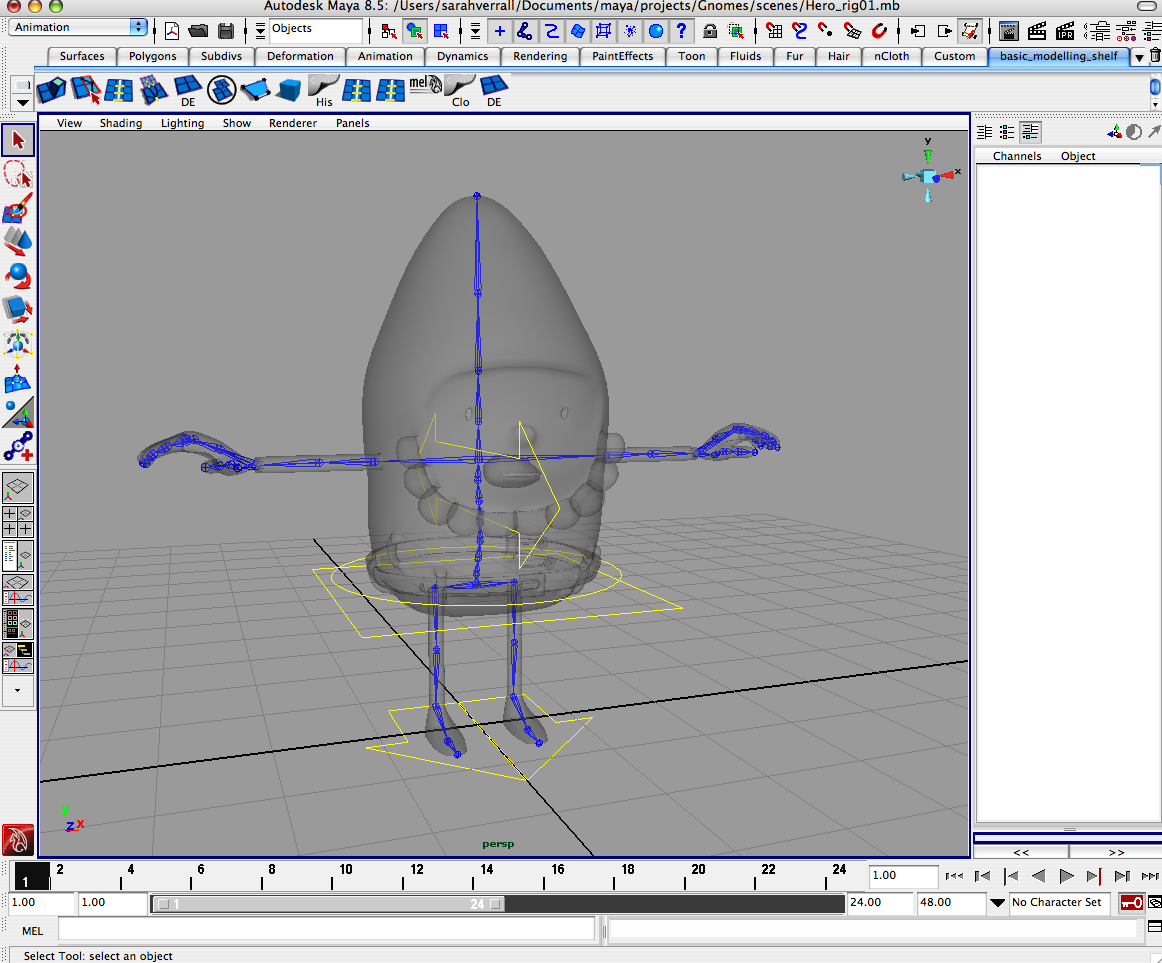
The fully complete rig complete with FK arms, IK Spline, Set driven keys for the fingers, root control and a host of foot attributes as well as the suggested rib, face and tummy bones to help distribute and ease the painting weights later on.

A quick smooth skin bind test to see how things are looking, moving, deforming. Already were getting some really nice animation stances without too much deformation here in this walk pose. This should literally need a slight adjustment in its weights.
Ah now i can really see the benefits of adding the tummy and face joints to the rig as poses like this now mean there is less deformation occurring in the face. Hopefully it should make painting the weights a quicker process.

Slight explosion going on here when rotating the arms however this just requires smoothing out of weights, shouldn't be too much of a problem.

and a final look at the set driven keys, again nothing massivley deforming here, the main area that will need focusing on is the flap of skin between the thumb and fingers which is affected by multiple joints. Apart from that, no serious issues here, so I'll be waiting on Yanivs blend-shaped character before I can bind/paint weights for.
Lady Gnomes rig requires a few variations on top of this. For example, myself and Matt decided she needed joints placed within her hair so that any collisions with her arms when she's clapping can mean the animator can simply move the hair away or react to her hands clapping. We tried removing the hair but she lost her look that we liked so much.

p.s my easter egg...another Wilf sent my way...its beginning to get creepy now.