Saturday 22 May 2010

saturday

must be a weekend....im at college!

changed the image size of ALL leaf textures...each was 2000 x 2000 (unnecessarily might i add) and with about 1000 leaves in a cut down scene it was killing mental ray for render previews when on smooth preview.

Original leaf textures have been kept but please make sure if you assign colours (myself and Adam) you are using the ones with SMALL at the end of their name. These textures are 500 x 500 and have lost no quality what so ever.

Have cleaned up the history even further on all camera set up animated shots, got rid of whats not needed so render time is faster > hacked that scene right down.

Adjusted the grass texture. Matts original texture was 4000 x 4000 and once scaled down by grigsby to 2000 x 2000 displayed the massive white borders in the scene file. Myself and Adrian took the file back into photoshop and took a new 2000 x 2000 sample that got rid of the majority of the borders so the grass texture now covered more of the scene. This can easily be moved and rotated to accommodate more shots including some of the larger spaces such a shot 2 where we see from Hero's side of the garden to Machos.

Feedback to Clym, Roman, Alex Bax and email to Fahran about UVing the tree.


Saturday 15 May 2010

compositing and compression

Today myself and Adam composited shot 4 in after effects.
So in total we have 6 render layers
2 for the character and 4 for the environment.
Character layers include beauty and ambient occlusion.
Environment layers include beauty, ambient occlusion, shadow and Z depth. This is not including our adjustment layers etc in After Effects.
Z depth is now my favorite...goodbye ambient occlusion and the wonders you used to bring to my eyes everytime i saw you...its Z depth all the way. Amazing how it transported the file and gave it filmic quality. Played around with the focal distance for a while until we were satisfied and the results are fantastic!

Since the character occlusion takes the longest to render, Adam suggested getting all finished shots having this layer rendered. The background (unless camera is moving) requires one frame and the other layers take no time at all to do. Matt is now organising the eyes for the finished animations and then I will be sorting out the camera framing so that adam can render sat eve. Looks like its down to me to try and replicate Grigsby's amazing lighting he achieved here so fingers crossed.

We then took the uncompressed After Effects file and began experimenting with different compression formats in Final Cut. Its a strange thing how different colour displays and setups make the world of difference to the look of the final piece, however with a few tries (thanks Adrian for his help on compression/formats) we're looking at mpeg2 which maintained most of the colour and quality of the final film. Hopefully (and I need to speak to Dalli about this Monday) this format will work fine for making the final DVD for the degree show and we shouldn't lose too much quality from further compression.

I gotta say...its looking bloooooomin marvelous guys :)
uncompressed file from After Effects...

mpeg2 compressed file from final cut...


Thursday 13 May 2010

shot 21

havent posted in a while
back on the animation now which is gooooood news and back to shot 21.
So far so good....not finished...comments/feedback wanted as always.


Ignore the disappearing fork...again its something thats not sorted out until last until the hand/arm movements are locked down final. The throw downs are in stepped and from the punch onwards is in spline.


Heres the view from the camera. I've tried to make the shot flow nicely from one side to the other when it cuts to matt's shot 22

Dan...

Its looking good dan, the pic you uploaded was on the small size, so when i took it into photoshop it was kinda difficult to see the cracks exactly but from what i could tell its looking nice. I've drawn over what you've done and just added some smaller section cracks which will just finish it off nicely if you don't mind adding these in please. Thank you :)

Sunday 9 May 2010

set the stage...

welcome to the jungle...er...i mean garden.
Machos Area...pointy leaf colours need altering but this is a simple assign existing material click away. Machos area I wanted to stay pretty rough and hard edged...hence more pointy leaves. The gaps for the Wheelbarrow...

where as Heros area has more rounded leaves with splatters to reflect the better kept section of the garden. Mixtures of greens, oranges and reds to represent the change of seasons to autumn.

Friday 7 May 2010

Compositing/Lighting 1 on 1

My thanks to Grigsby for sitting with me and Adam Thursday evening and sharing a wealth of knowledge on how to achieve some great lighting and compositing for our scene.

Dan showed us the fundamentals of lighting and what was needed for the scene and the characters to light sufficiently. As our scene is outdoors, it does mean a less intricate lighting setup is required and with the use of light linking there are 2 lights for the character (3 if you include the main environment directional) and a few other ambients to help the scene. Dan showed us how to tweak the textures to fit with the lighting and how some of the textures may need colour adjustment to prevent overexposure and over saturated colours.

From this, Dan rendered a single frame for the environment and the character as well as occlusions for both and then took us through how to overlay in After Effects and the further colour adjustments, sharpen masks, blurs and screens that can be added to soften the 3D visuals and give more depth to the film.

I'll post up an image shortly but the results he achieved were astounding and he's kindly allowed us to keep the file for reference and learning how to transfer the attributes/settings over. We also have a copy of his lights as a tutorial for how we should be setting up the rest of our lights for the film.

Thank you again Grigsby, its been extremely beneficial to watch you at work and learn more about creating great scene setups :)

Wednesday 5 May 2010

webmail....

if i dont reply to your webmail mails...this is why...
webmail is rubbish!!

Sunday 2 May 2010

Shot 19 - tweaks

been working some more on this shot trying to tackle the feedback you've all provided.

Here i've started adding in the bend in his arms via matt's suggestion of increasing the struggle with the weight. I've shifted the keys now so he manages to stand up right a little slower to emphasize the weight, as a couple of comments hinted it seemed an easy task for him.


please ignore the strange angles the fork is going off at...haven't matched up the second arm yet until i know the first is final. Arm bend to straight - trying to add more pop to the movement from one extreme to another as if he's really pushing this last effort to do it.


of course...ive been animating from angles like this....


when our camera angle is actually from here...


again this is not the final but just updates on how this shot is going. Hasn't been as successful a day with it as dealing with the nitty gritty is a long process. I hope to have a better day on this tomorrow and be able to move on soon. Comments welcome as always

Saturday 1 May 2010

Animation make brain go mental...

work...here...not there
up....errmm....key select
that is all

Shot 19

On a break from shot 18....started this this afternoon....

This shot sees Macho lifting the garden fork. Its should display a challenge for him but not be a complete hinderance unlike the flower pot he lifts later on. Since my weight lifting skills involve lifting mars bars....my reference for this shot has come from footage like this...


Initial playblast demonstrating blocking of key poses...might shift that end position forward a bit. Dont worry about the second arm, im working on the one first then matching the second as its a nightmare with parenting the object to just one wrist control.


starting to spline it...that scary moment when thingy freak out and more keys needed


Progress....check out that cheeky grin at the end....o yeah :)


its not finished...not by a long shot but hey thoughts

Friday 30 April 2010

Animation Webpage: more tests

ok...smurfed up Yaniv, whitened up the backgrounds...comparison to the rest of you lovely lot. comments pllllleeeease

Animation Webpage: tests

previous images compared to the new uns....


Wednesday 28 April 2010

replicating degree show photos

myself and dan decided to organize another photoshoot for the last few animators who were without one. Dan S has been doing an amazing job with the website and its really highlighting the dependancy on having photos to help navigate round the site and let everyone know whose contribute where.

Were hoping to get the photography studio booked so we can use the backdrop and lights to replicate the photos...failing this we'll have to improve with some paper and natural lighting which should do the trick just as well.

Replicating the post production acheived on the previous photos was not a "quick process". I played around with basic photo filters as well as off setting colour balances on a couple of test photos to see how it was achieved. Whilst this produced the "blue ish tinge" that seemed to be present in the final pictures, it was difficult to tell if i was on the right track without having an original photograph to mess around with: with similar lighting and background setup.

So after a couple of seconds pondering...i stole the photographs from the degree show website and decided the best way to solve it...was to reverse the process. I took a few examples and colour balanced them to have "normalish" colourings, from this you can easily work out the opposite needed to create the final look.

I tried this with 4 of the guys photos (thanks test lot) and the colour shifts arent consistent which is obviously due to individuals skin and hair tones. So we can probably "get away with" a certain amount but obviously want to be as true to the final look as possible.

Photo sizes are also inconsistent, which are either 4KB or 8KB in size which would explain difference in resolution quality between the whole group.

Final image sizes are 170x170 pixels.

Im pretty confident we can replicate this now and i'll be glad to sort these out post wise and then hand over to dan to post on the website.

these arent by any stetch of the means perfect but give us a good starting point to work from. These look pixelated/bad as im working with small compressed images and so reversing colour will not look perfect. You can also see the pictures are desaturated as well which will need to transfered onto the new photos aswell.


Tuesday 27 April 2010

Updates

I can say without question or concern i have learnt more this year than any other year...

i will copy and paste this sentence every year following this one without doubt!

So to business and by gum has it been business. Character setups are crazy and still murky waters in terms of fully understanding all the necessary this first, parent that next, no this is not the way blah blah blah BUT i challenged myself to pursue this further than i ever have before and to see it through so we had decent rigs with proper controls etc.

This last week can not go without credit to the following person: Adrian Smith

Who spent the last week skinning not 1...but 2 of our characters. This guy is not (no offence) an animator but a broadcaster, who one day i decided to let loose on Maya and teach him the odd thing here and there...a bit of modeling, a bit of animating, a bit of rigging, render layers and what have you. Now he's pursued his knowledge of skinning and (somewhat embarrassingly) overtaken me on that one.

"Hahahahaha" i hear you say....maybe? However i personally think whoevers best for the job should do it and hey...he was better. The week was mostly live screen sharing until 4am with us sending the model of Lady Gnome back and forth. Me adjusting the arms and fingers and Ad doing pretty much everything else including fine tuning the fingers and arms i did. It really does highlight the collaboration between animator and rigger, as every single movement needed was discussed and worked on in the weights. Any issues that occurred during the skinning such as the teeth receiving no influence, the hair pulling the teeth out of its geometry the flower flying around the screen of its own accord was left to me to problem solve and generally trashing one version of the model until a solution was found and adding it to the final whilst Ad fine tuned the weights.

Do not dismiss who you may learn something from as from his knowledge of weights I've learnt how i can rig my characters better and even model my characters better for the future. There is nothing drastically wrong with these (i will fight my corner here) but knowing i can do better in the future is something im certain of just from what ive learnt here.

Clyms weights of Hero came through on the Thursday but unfortunately not up to scratch so were redone by Adrian and completed Saturday. The benefits of having the director there to discuss every movement needed is key and was how we were able to get Hero the way he does.

My thanks also to Mu Li
who solved the button not wanting to scale issue with his mel script. Thanks for taking the time to sort that out its much appreciated :)

Thanks also to Alex Hulse
for all your help assisting me with rigging and helping me understand it a lot more than i did.

All i then had to do was add the facial control panel and scale the characters accordingly. These are now available on the adrive account and our animators have been notified and can start work immediately.

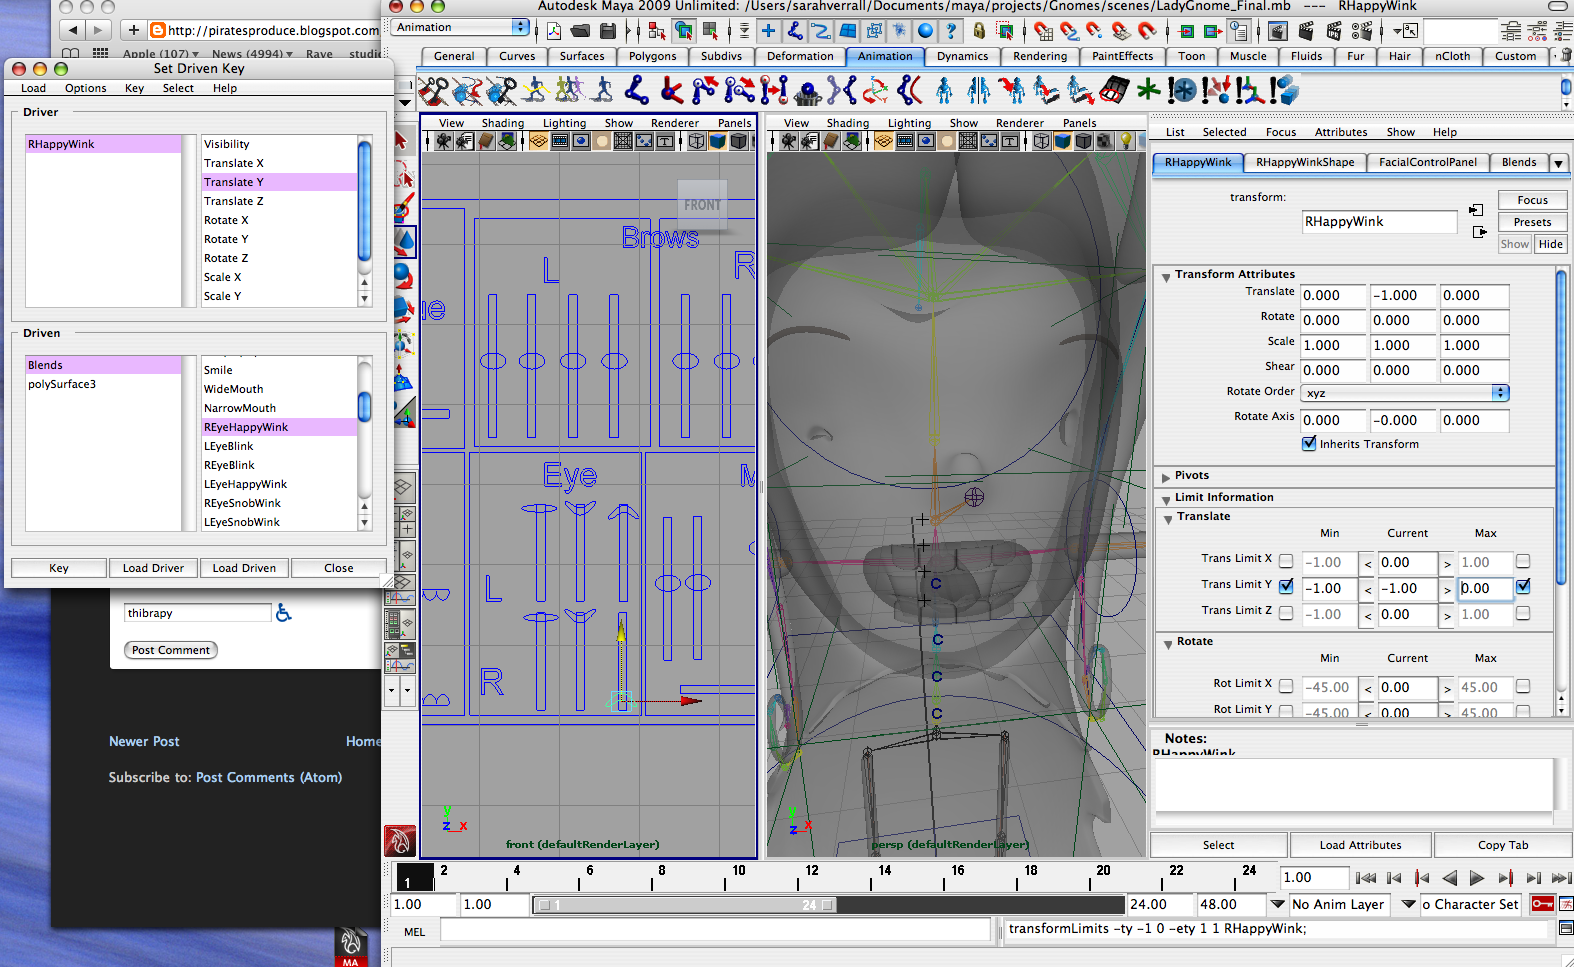
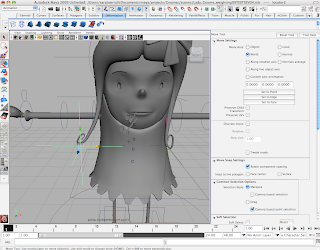
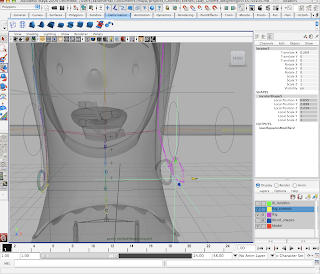
A look at Lady Gnomes facial control panel....very pleased with this. All locked off and limited accordingly and fianlly parented to the master control so it will follow the character nicely.

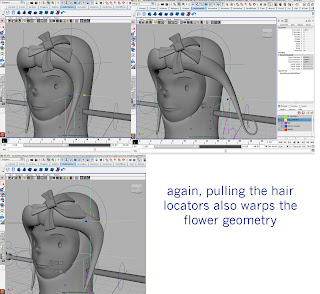
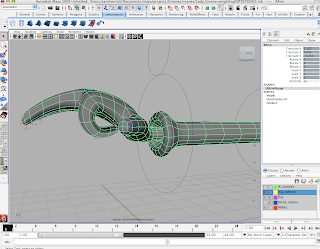
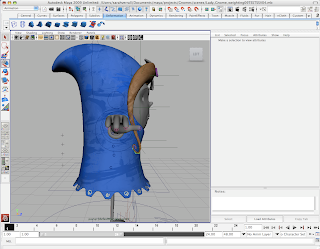
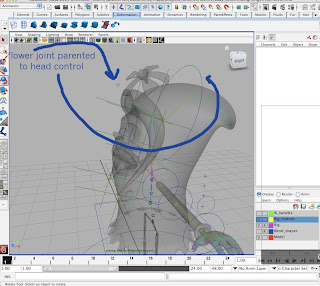
the problematic hair geometry...when you move the hair locators it warps the flower. The flower recieves no influence from anything though and you cant seem to paint it out. I will probably need to add a joint in and add influence to solve this.


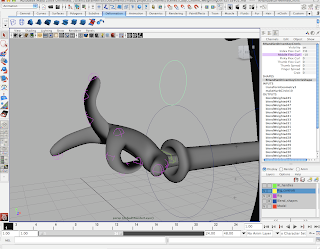
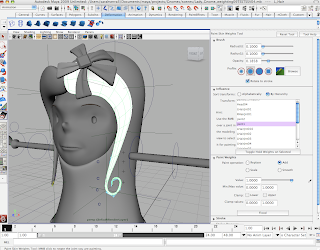
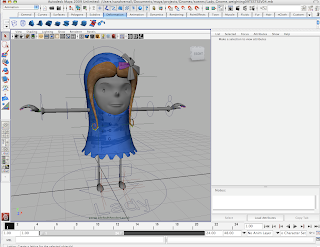
attempting some painting weights with Lady Gnomes fingers....


checking it against all the hand attributes...


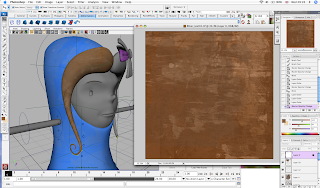
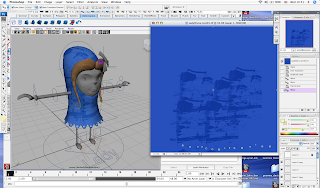
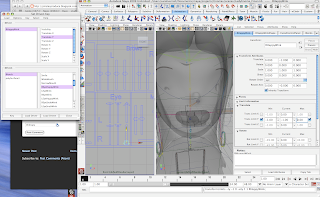
Painting lady gnomes textures....


backing up EVERYTHING!!!!

Lady Gnomes painted textures require subtlety so we dont see the seam at the back.


the completed Hero gnome rig! werhey!
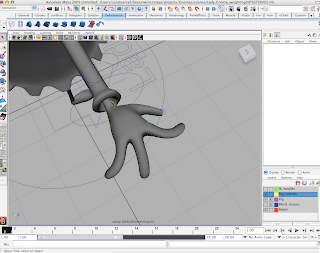
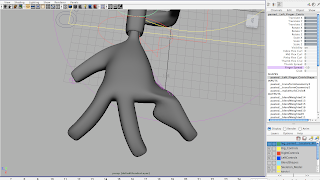
fingers shouldnt ever be able to reach this lengths of stretchyness

awwww look at the lil puddun'
scaling hero via the master control...
...one of his buttons is problematic and seems to not want to go with him!?!??! it has the same parenting and weighting as the other button so im stumped here!?
locking off the facial control panel sliders so they only go up and down by 1 to -1.

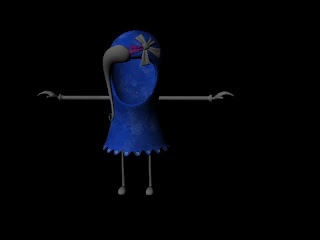
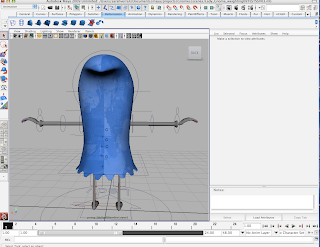
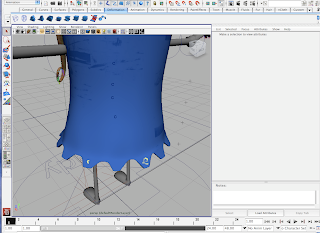
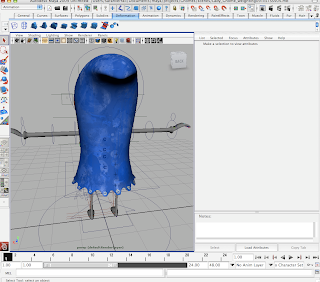
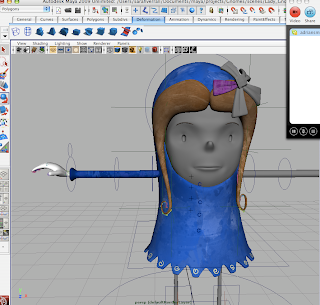
where the heck is her face and hair?!??!